Streamline SentinelOne Endpoint Scans with Power Automate
Automating SentinelOne disk scans with Power Automate helps security teams execute regular endpoint security scans while keeping everyone in the loop via Microsoft Teams. With Power Automate calling SentinelOne APIs and formatting real-time results using Adaptive Cards, your team gains visibility into disk scan activity without digging through dashboards. This workflow dynamically triggers full scans on both active and inactive agents, formats results with timestamped summaries, and sends clean updates straight into your Teams channels.
Below is the full step-by-step breakdown including the exact Power Automate flow configuration and a sample Adaptive Card JSON.

What You’ll Need
- SentinelOne account with API access
- Microsoft Teams workspace and a designated channel
- Microsoft Power Automate access
Step-by-Step Integration Guide
1. Generate SentinelOne API Token
Login to your SentinelOne console and grab your API token. You’ll need it to authenticate HTTP requests from Power Automate.
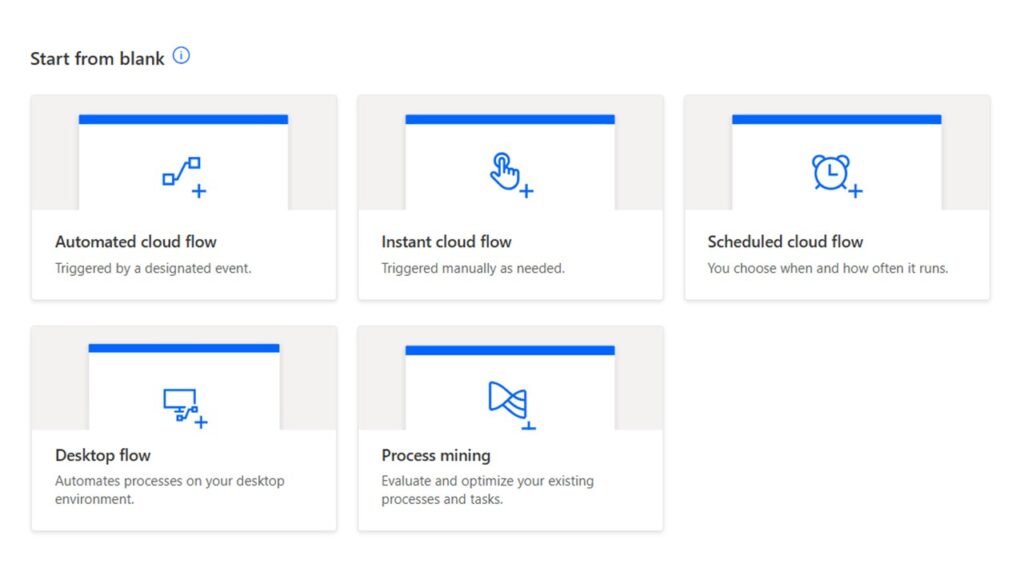
2. Create a New Power Automate Flow
Go to https://flow.microsoft.com. Create a new Automated cloud flow or Instant cloud flow.
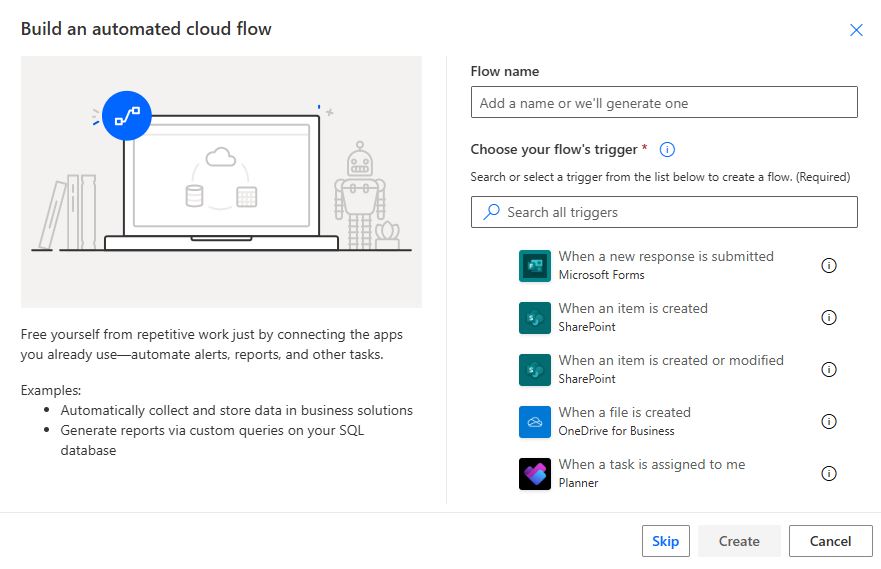
3. Give it a name and click Skip to configure manually
4. Add a Recurrence Trigger (Polling Schedule)
Add a (Schedule) Recurrence trigger with these details:
| Field | Value |
| Interval | 1 |
| Frequency | Week |
| Time zone | (UTC) Coordinated Universal Time |
| Start time | 2024-01-01T00:00:01Z |
| On these days | Monday |
| At these hours | 12 |
This will kick off your disk scans every Monday at 12:00 PM UTC.

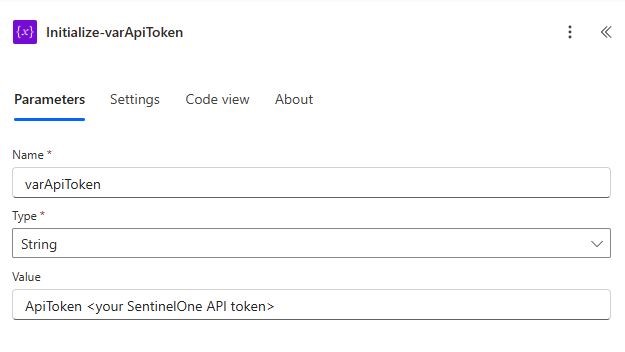
5. Initialize Global Variables
Add a (Variable) Initialize variable action. Do this for each of the mentioned variables below:
| Action Name | Name | Type | Value |
| Initialize-varApiToken | varApiToken | String | ApiToken <your SentinelOne API token> |
| Initialize-varTenant | varTenant | String | https://<your SentinelOne tenant URL> |
These help you reuse values without hardcoding them all over the flow.

6. Initiate Disk Scan on Active Agents
6a. Add a (HTTP) HTTP action. Rename the action to Post-API-active. Use the details provided below:
| Field | Sub-field | Value |
| URI | @{variables(‘varTenant’)}/web/api/v2.1/agents/actions/initiate-scan | |
| Method | POST | |
| Headers | Authorization | @{variables(‘varApiToken’)} |
| isActive | true |
This sends the scan command to all agents that are currently online, ensuring active systems get scanned immediately.

6b. Add a (Content Conversion) Html to text action. Rename the action to Htmltotext-active. Use the details provided below:
| Field | Value |
| Content | @{body(‘PostAPI-active’)} |
This strips away the clutter and gives us plain text to work with.

6c. Add a (Data Operation) Parse JSON action. Rename the action to ParseJSON-active. Use the details provided below:
| Field | Value |
| Content | @body(‘Htmltotext-active’) |
| Schema | { “type”: “object”, “properties”: { “data”: { “type”: “object”, “properties”: { “affected”: { “type”: “integer” } } } } } |
Now we’ve got a clean and structured format, so we can use the number of affected agents in other parts of the flow.

7. Initiate The Scan for Inactive Agents
7a. Add a (HTTP) HTTP action. Rename the action to Post-API-inactive. Use the details below:
| Field | Sub-field | Value |
| URI | @{variables(‘varTenant’)}/web/api/v2.1/agents/actions/initiate-scan | |
| Method | POST | |
| Headers | Authorization | @{variables(‘varApiToken’)} |
| isActive | false |
This ensures agents that are offline will perform a scan the moment they come back online.

7b. Go to the Settings tab, then go to the Run after drop-down. Click on Select actions and choose Initialize-varTenant. Make sure Is successful is checked.
This allows the flow for inactive agents to run alongside the one for active agents.

7c. Add a (Content Conversion) Html to text action. Rename the action to Htmltotext-inactive. Use the details below:
| Field | Value |
| Content | @{body(‘PostAPI-inactive’)} |
This removes unnecessary formatting and provides plain text for easier processing.

7d. Add a (Data Operation) Parse JSON action. Rename the action to ParseJSON-inactive. Use the details below:
| Field | Value |
| Content | @body(‘Htmltotext-inactive’) |
| Schema | { “type”: “object”, “properties”: { “data”: { “type”: “object”, “properties”: { “affected”: { “type”: “integer” } } } } } |
Now we have a clear and organized format that lets us use the number of affected agents elsewhere in the flow.

8. Build the Adaptive Card
8a. Add a (Variable) Append to string variable action and rename it to Append-varCard. Choose the varCard variable as value on the Name field and add the following as Value:
{
    "type": "AdaptiveCard",
    "$schema": "http://adaptivecards.io/schemas/adaptive-card.json",
    "version": "1.4",
  "msteams": {
      "width": "Full"
  },
    "body": [
        {
            "type": "TextBlock",
            "text": "SentinelOne • Full Disk Scans",
            "wrap": true,
            "size": "Large",
            "color": "Accent",
            "weight": "Bolder"
        },
        {
            "type": "TextBlock",
            "text": "@{convertFromUtc(startOfHour(utcNow()), 'GMT Standard Time', 'ddMMMyyyy HHmm')}(UTC)",
            "wrap": true,
            "spacing": "None",
            "isSubtle": true,
            "size": "Small"
        },
        {
            "type": "TextBlock",
            "text": "Total agents with full disk scans initiated",
            "wrap": true,
            "size": "Small",
            "isSubtle": true,
            "horizontalAlignment": "Right"
        },
        {
            "type": "ColumnSet",
            "columns": [
                {
                    "type": "Column",
                    "width": "23px",
                    "items": [
                        {
                            "type": "TextBlock",
                            "text": "@{body('ParseJSON-active')?['data']?['affected']}",
                            "horizontalAlignment": "Right",
                            "spacing": "None"
                        },
                        {
                            "type": "TextBlock",
                            "text": "@{body('ParseJSON-inactive')?['data']?['affected']}",
                            "horizontalAlignment": "Right",
                            "spacing": "None"
                        }
                    ]
                },
                {
                    "type": "Column",
                    "width": "stretch",
                    "items": [
                        {
                            "type": "TextBlock",
                            "text": "▸ Connected agents",
                            "spacing": "None"
                        },
                        {
                            "type": "TextBlock",
                            "text": "▸ Disconnected agents",
                            "spacing": "None"
                        }
                    ],
                    "horizontalAlignment": "Left",
                    "spacing": "Small"
                }
            ],
            "separator": true
        }
    ]
}
This card shows a title, timestamp, initiated active and inactive scans dynamically.
8b. Go to the Settings tab, then go to the Run after drop-down. Click on Select actions and choose ParseJSON-active and ParseJSON-inactive. Make sure Is successful is checked for both.

This will ensure that both the active and inactive scan flow data will be available on the Adaptive Card action.
9. Post the Card to Teams Channel
The final step is to post the Adaptive Card to your designated Microsoft Teams channel.
Add a (Microsoft Teams) Post card in a chat or channel action. Add the details below:
| Parameter | Value |
| Post as | Flow bot |
| Post in | Channel |
| Team | <your Microsoft Teams team> |
| Channel | <your Microsoft Teams channel> |
| Adaptive Card | @variables(‘varCard’) |
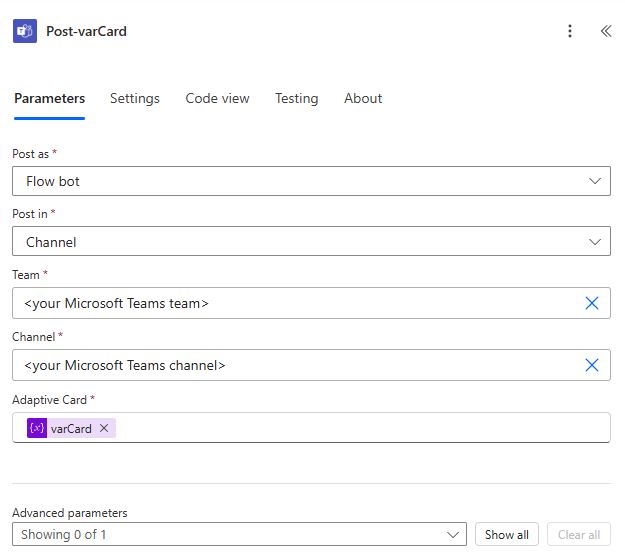
Your team is now also getting real-time notifications for this operation, nicely formatted, right inside Teams.
